Tired of messy glue and long application times? Many of us have been there, struggling with traditional strip lashes, only to end up with smudged liner or lashes that peel off mid-day. If you dream of achieving gorgeous, fluttery lashes in minutes without the fuss, you’re in the right place.
This guide will show you exactly how to put on magnetic eyelashes so you can get that polished look quickly and easily. You’ll learn simple tricks and tips that make application a breeze, saving you time and frustration, and helping you feel confident and beautiful.
Key Takeaways
- You will learn the different types of magnetic lashes and how they work.
- Discover the essential tools and preparation steps needed for successful application.
- Get step-by-step instructions on how to apply magnetic lashes correctly.
- Understand common mistakes and how to avoid them for a flawless look.
- Learn tips for ensuring your magnetic lashes stay put all day and how to care for them.
Understanding Magnetic Eyelashes
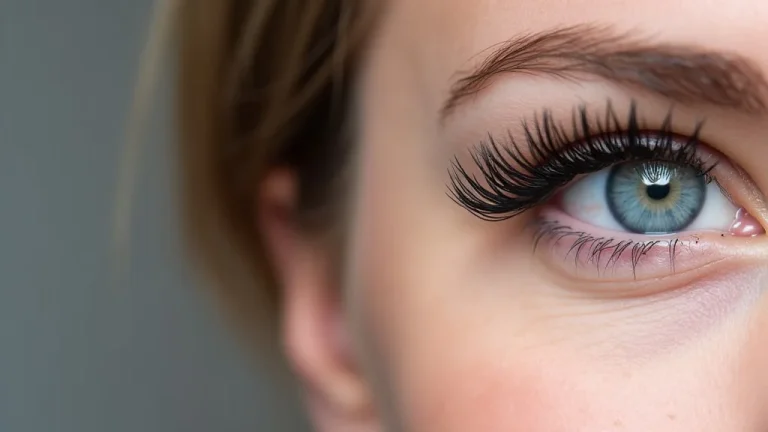
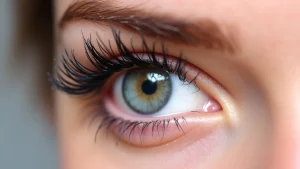
Magnetic eyelashes offer a revolutionary way to enhance your natural look without the use of adhesives. They work on a simple principle: tiny magnets embedded in the lash bands allow them to “sandwich” your natural lashes. This creates a secure and comfortable hold that lasts all day.
Unlike traditional falsies, there’s no sticky residue, no drying time, and significantly less room for error during application. This makes them an excellent choice for beginners or anyone seeking a faster, cleaner beauty routine. The technology has advanced, offering various styles from subtle to dramatic, catering to every preference.
Types of Magnetic Eyelashes
Magnetic lashes come in a few primary styles, each designed for different application methods and aesthetic results. The most common are those with multiple small magnets along the lash band, designed to adhere to each other around your natural lashes. Another popular type features a full magnetic band that connects to a magnetic eyeliner.
Both offer convenience, but understanding their differences helps in choosing the best fit for your needs.
-
Magnetic Eyelash Strips with Micro-Magnets: These lashes have 3-5 tiny magnets strategically placed along the lash band. You place one strip above your natural lash line and the other directly below, and they snap together. This method provides a very secure hold.
This method is favored for its strong grip. The magnets are small and often covered by the lash fibers, making them nearly invisible once applied. The key is precise placement, ensuring the magnets align correctly to create a seamless bond.
-
Magnetic Eyeliner Lashes: These consist of lash strips with a magnetic band. You apply a special magnetic eyeliner along your lash line, and then simply place the magnetic lash strip on top of the eyeliner. The magnets in the lash band cling to the magnetic particles in the eyeliner.
This system simplifies the process even further, as you’re not dealing with two separate lash pieces. The magnetic eyeliner acts as the anchor, making application feel more like drawing a regular winged liner. It’s often considered the easiest type for beginners to master.
-
Individual Magnetic Lashes: These are small clusters of magnetic lashes that you can apply to specific sections of your lash line for a customized look, similar to lash extensions but without the salon visit. They often use a similar magnetic eyeliner system or tiny magnets that snap together.
These offer the most versatility. You can use them to fill in sparse areas, add volume to the outer corners, or create a full, layered effect. The control over placement allows for a truly personalized lash style, mimicking professional application with ease.
How Magnetic Lashes Work
The magic behind magnetic eyelashes lies in the power of small, potent magnets. Each lash strip, or sometimes individual lash clusters, contains one or more tiny magnets. These magnets are designed with opposite poles facing each other, allowing them to attract and securely connect.
When you apply magnetic lashes, you’re essentially creating a sandwich effect. For strip lashes with multiple magnets, one segment of the lash band goes above your natural lashes, and another segment goes below. When positioned correctly, their magnetic fields align, pulling them together and clamping onto your natural lashes.
For magnetic eyeliner lashes, the process is slightly different but equally clever. The special eyeliner contains iron oxide particles, which are ferromagnetic. When you apply the eyeliner, you create a magnetic strip along your lash line.
The magnetic lash band then adheres to these iron oxide particles, providing a strong hold without any traditional adhesive. The strength of these magnets is carefully calibrated to be secure enough to stay put throughout the day but gentle enough not to damage your natural lashes.
Preparing for Magnetic Lash Application
Getting your lashes ready is just as important as the application itself. This preparatory stage ensures a smooth, clean surface for the magnets to adhere to, which ultimately contributes to a longer-lasting and more natural-looking application. Think of it like prepping a canvas before painting; a good base makes all the difference in the final result.
This involves ensuring your natural lashes are clean and free from any oily residue, and that your eyelids are also clean and dry.
Clean Your Natural Lashes
Before you even touch the magnetic lashes, it’s crucial to ensure your natural lashes are clean. Any leftover mascara, eyeliner, or natural oils can prevent the magnets from making a proper connection. This is especially important if you’ve been wearing mascara or other eye makeup.
-
Gently cleanse your lashes: Use a gentle, oil-free makeup remover or a cotton swab dipped in micellar water to carefully wipe along your lash line. Make sure to remove all traces of old makeup.
Oil is the enemy of magnetic adhesion. Even a tiny amount can create a barrier. So, take your time with this step and be thorough.
You want a clean, dry surface for the magnets to grip onto.
-
Avoid oily products near your eyes: On the day you plan to wear magnetic lashes, try to avoid applying heavy eye creams or serums that might transfer onto your lash line. If you do, make sure to gently wipe the area clean before application.
This simple habit can prevent a lot of frustration. When your skin and lashes are clean and dry, the magnetic attraction works at its best.
-
Consider curling your lashes: If you have naturally straight lashes, curling them beforehand can give magnetic lashes a better base to adhere to and blend in more naturally.
This step is optional but can enhance the final look. It helps your natural lashes and the falsies merge more seamlessly, giving you a more voluminous effect.
Prepare Your Eyelids
Just like your lashes, your eyelids need to be prepped for optimal magnetic lash wear. A clean, dry eyelid surface allows the magnetic eyeliner or the lash magnets themselves to adhere securely without sliding or shifting throughout the day.
-
Wash and dry your face: Start with a clean canvas. Wash your face thoroughly with your regular cleanser and pat your eyelids dry gently. Ensure there’s no residual moisture.
This ensures that any natural oils or product residue are removed. A dry surface is key for magnetic elements to cling effectively.
-
Apply a thin layer of oil-free primer or eyeshadow: If you have oily eyelids, consider applying a very thin layer of an oil-free eyeshadow primer or a neutral eyeshadow. This can help absorb excess oil and provide a smoother base.
This step is particularly helpful for those with naturally oily skin. It creates a barrier that prevents oil from interfering with the magnetic bond.
-
Avoid heavy creams or lotions: As mentioned before, any oily or creamy products applied too close to the lash line can compromise the magnetic connection.
Keep your eyelid area as free from emollient products as possible. This ensures the best possible grip for your magnetic lashes.
Step-by-Step Application Guide
Now that you’re prepped, let’s get to the exciting part: applying your magnetic lashes! The process is straightforward, but a little patience and practice can make a big difference. We’ll cover the two main types of magnetic lashes to ensure you’re ready for anything.
Applying Magnetic Eyelash Strips with Micro-Magnets
These lashes feature small magnets along the lash band that clamp onto each other. The key here is precision and patience. You’ll be working with two separate lash pieces, so getting them to align perfectly is essential for a natural look and secure hold.
-
Take one lash strip and identify the top and bottom pieces. Often, they are slightly different shapes or lengths to ensure the correct placement.
Usually, the longer or more curved piece is meant for the upper lash line. Check the packaging for any specific instructions on orientation.
-
Position the top lash strip along your natural lash line, just above your own lashes. You can use your fingers or tweezers to hold it in place.
Get as close to your natural lash line as possible without touching your eyelid skin. This creates the most seamless look.
-
Carefully take the bottom lash strip and align its magnets with the magnets on the top strip, directly beneath your natural lashes. The two strips will snap together.
It might take a few tries to get the magnets to connect. Don’t force them; try to gently guide them together. Some people find it easier to apply the outer corner first, then work inwards.
-
Once both strips are attached, gently press along the lash band to ensure a secure fit. Adjust as needed.
Once they are snapped together, a gentle press can help them mold to the curve of your eye and reinforce the magnetic hold.
-
Repeat the process on the other eye.
Consistency is key for symmetry. Try to replicate the placement and pressure you used on the first eye.
This method offers a very secure and natural-looking result when applied correctly. The magnets create a firm bond, so you don’t have to worry about them shifting.
Applying Magnetic Eyeliner Lashes
This system is incredibly user-friendly and often preferred by beginners. It involves applying a special magnetic eyeliner first, then placing the lash strip onto it.
-
Shake the magnetic eyeliner well before use. Apply it along your upper lash line as you would with regular liquid eyeliner, creating your desired wing or thickness.
Ensure the line is solid and covers where you want the magnetic lashes to adhere. The eyeliner needs to be applied evenly for the lashes to stick properly.
-
Allow the magnetic eyeliner to dry for about 30-60 seconds. It should feel slightly tacky, not completely wet or fully dried.
This drying time is crucial. If it’s too wet, the lashes might slide. If it’s too dry, they won’t adhere.
The tackiness is what allows the magnets to connect.
-
Carefully take the magnetic lash strip and align its magnetic band with the dried eyeliner. Gently press the lash strip onto the eyeliner, starting from the inner corner and moving outwards.
The magnetic band of the lash strip will instantly cling to the magnetic eyeliner. Work slowly to ensure the lash sits as close to your natural lash line as possible.
-
Once the lash is in place, gently press along the entire lash band to secure it firmly.
This reinforces the connection and ensures the lashes won’t lift at the corners or anywhere else.
-
Repeat the process for the other eye. You can layer additional coats of magnetic eyeliner if needed for a stronger hold, but allow each coat to dry to a tacky finish first.
Some people find that a slightly thicker line of magnetic eyeliner offers a more robust grip. Experiment to see what works best for you.
This method is incredibly efficient, and once you get the hang of the eyeliner application, you can achieve a full lash look in just a couple of minutes.
Tips for a Flawless and Lasting Application
Achieving a natural, long-lasting look with magnetic lashes is all about the details. Even with the easiest application methods, a few extra steps can elevate your lash game. These tips focus on blending, securing, and ensuring your magnetic lashes stay put from morning to night.
Blending Your Magnetic Lashes
The goal is for your magnetic lashes to look like your own, just better! This means ensuring there are no visible gaps or harsh lines between your natural lashes and the falsies.
-
Apply a coat of mascara to your natural lashes before applying magnetic lashes. This helps them blend seamlessly with the falsies, making it harder to tell where your natural lashes end and the magnetic ones begin.
Make sure your natural lashes are dry after applying mascara. Clumping mascara can interfere with the magnetic adhesion.
-
If you used magnetic eyeliner, go over the lash band with a thin line of your regular liquid or gel eyeliner. This will hide the magnetic lash band and the eyeliner, creating a more unified and polished look.
This step is key to concealing the magnetic components. A well-applied liner can make all the difference in making the lashes look undetectable.
-
For magnetic strip lashes with micro-magnets, ensure they are placed as close to your natural lash line as possible. If there’s a small gap, a touch of black liquid liner can help conceal it.
The closer the placement, the more natural the effect. Don’t be afraid to use a little extra liner to perfect the blend.
Ensuring Longevity
No one wants their lashes to fall off unexpectedly. Here’s how to keep them secure throughout the day.
-
Avoid touching or rubbing your eyes. The more you manipulate the lashes, the more likely they are to shift or detach. Treat them gently!
This is basic lash care, but especially important for magnetic lashes. Constant fidgeting can weaken the magnetic hold over time.
-
Be mindful of moisture. While many magnetic lashes are water-resistant, prolonged exposure to heavy sweat, steam, or water can weaken the magnetic bond. Try to keep your eye area as dry as possible.
This means avoiding saunas or intense, sweaty workouts if you want them to last. If you do get them wet, gently pat them dry.
-
If you’re using magnetic eyeliner lashes, ensure you applied a sufficient and even amount of eyeliner. Sometimes, a second thin layer of eyeliner after the first has dried tacky can provide extra grip.
Don’t skimp on the eyeliner application for this type of lash. A solid foundation means a longer-lasting hold.
-
Carry a lash applicator or tweezers in your bag for quick touch-ups if needed, especially if you notice a corner lifting slightly.
A small tool can be a lifesaver for minor adjustments on the go. It’s better to fix a slight lift than to let it become a bigger problem.
Common Myths Debunked
Myth 1: Magnetic lashes are difficult to apply
This is a common misconception. While initial application might require a little practice, especially for strip lashes with micro-magnets, the magnetic eyeliner system is incredibly straightforward. Many users find it much easier and faster than applying traditional strip lashes with glue.
With a few tries, most people become adept at applying them quickly and efficiently.
Myth 2: Magnetic lashes damage your natural lashes
When applied and removed correctly, magnetic lashes are very unlikely to cause damage. Unlike glue-based lashes which can pull or break natural lashes during removal, magnetic lashes simply un-clasp. The key is gentle removal and proper care of both the magnetic lashes and your natural lash line.
Avoid tugging or forcefully pulling them off.
Myth 3: Magnetic lashes don’t look natural
Magnetic lashes come in a vast array of styles, from subtle and wispy to full and dramatic. When applied correctly, positioned close to the lash line, and blended with mascara or eyeliner, they can look incredibly natural. The absence of a thick glue line also contributes to a more seamless finish compared to traditional falsies.
Myth 4: Magnetic lashes are not durable and fall off easily
This depends on the quality of the lashes, the application method, and how well you prepare your eyelids and lashes. High-quality magnetic lashes, especially when paired with a good magnetic eyeliner or applied precisely with micro-magnet strips, can stay on securely throughout the day. Avoiding excessive moisture and touching your eyes also significantly increases their longevity.
Frequently Asked Questions
Question: How do I remove magnetic eyelashes?
Answer: To remove magnetic lashes, gently un-clasp the magnets. For magnetic eyeliner lashes, use an oil-based makeup remover to dissolve the magnetic eyeliner. Wipe gently with a cotton pad until the eyeliner and lashes are removed.
Avoid pulling forcefully, as this can damage your natural lashes.
Question: Can I wear mascara with magnetic lashes?
Answer: Yes, you can. Applying a light coat of mascara to your natural lashes before putting on magnetic lashes helps them blend better. However, avoid applying mascara directly to the magnetic lashes themselves, as this can damage them and make them harder to reuse.
Question: How many times can I reuse magnetic lashes?
Answer: With proper care and cleaning, magnetic lashes can be reused multiple times. For magnetic eyeliner lashes, the lifespan depends more on the eyeliner’s consistency and the lash band’s condition. For micro-magnet lashes, gently cleaning them after each use can extend their life significantly.
Question: What if the magnets don’t stick together?
Answer: Ensure your natural lashes and eyelids are clean and free of oils. If using magnetic eyeliner, check that it’s applied evenly and has dried to a tacky consistency. Try realigning the lash segments or gently pressing them together.
Sometimes, a second coat of magnetic eyeliner can help.
Question: Can I sleep in magnetic eyelashes?
Answer: It is not recommended to sleep in magnetic eyelashes. Sleeping can cause them to shift, detach, or become damaged. It’s best to remove them before going to sleep to preserve them and avoid any potential discomfort or damage to your natural lashes.
Conclusion
Mastering how to put on magnetic eyelashes is now within your reach. By following these simple steps, from preparation to application and blending, you can achieve beautiful, natural-looking lashes in no time. Experiment with different styles and methods to find what works best for you.
Enjoy your stunning new look with confidence!