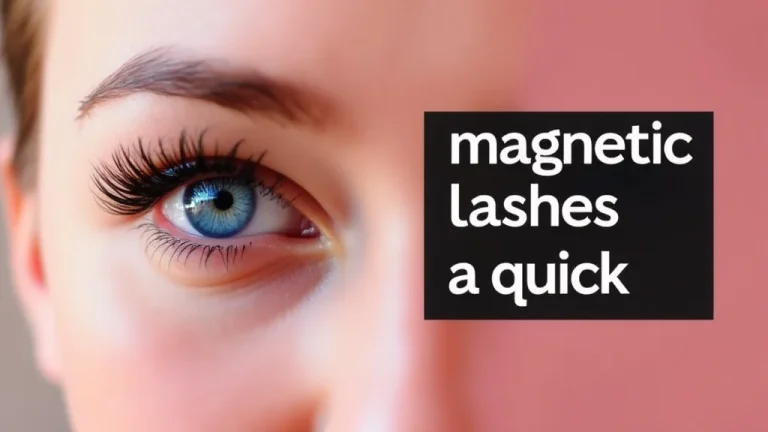
Struggling to get your false lashes to look just right without all the sticky mess? You’re not alone. Many people find applying traditional lash glue to be a tricky, messy, and time-consuming process.
If you’ve ever ended up with glue on your eyelids or uneven lashes, you’ll be happy to know there’s a simpler way. This guide will show you exactly how to use magnetic eyelashes to achieve beautiful, full lashes quickly and effortlessly, giving you more time to enjoy your look and less time stressing over application.
Key Takeaways
- Magnetic eyelashes offer a glue-free, easy application method.
- Understanding the types of magnetic lashes is key to choosing the right pair.
- Proper preparation of your natural lashes ensures a secure and natural look.
- Step-by-step instructions cover precise placement for a flawless finish.
- Tips and tricks help you achieve longer wear and a comfortable experience.
- Troubleshooting common issues ensures a successful application every time.
What Are Magnetic Eyelashes
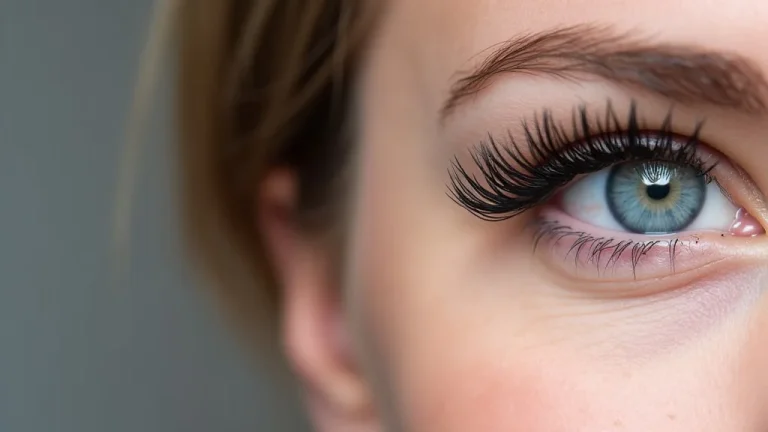
Magnetic eyelashes are a revolutionary beauty product designed to simplify lash application. Unlike traditional false lashes that rely on adhesive glue, magnetic lashes use tiny magnets embedded along the lash band. These magnets securely “sandwich” your natural lashes, creating a natural-looking enhancement without the fuss and potential mess of glue.
They offer a quick and reusable alternative for anyone seeking fuller, longer lashes.
The concept is straightforward yet ingenious. Each magnetic lash strip typically comes with two parts, or sometimes one strip with multiple magnetic anchor points. These components are designed to attach to each other, with one part resting above your natural lash line and the other underneath.
The magnetic force holds them in place, offering a secure hold throughout the day.
This innovation addresses common frustrations associated with traditional false lashes, such as allergic reactions to glue, difficulty in precise application, and the messy cleanup. Magnetic lashes are generally considered hypoallergenic, making them a great choice for sensitive eyes. They also tend to be more forgiving for beginners, as their application is more about alignment than perfect glue distribution.
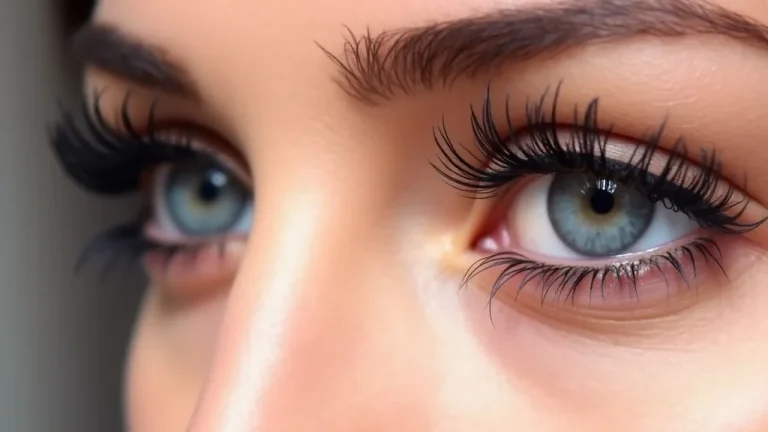
Magnetic lashes can be found in various styles, from subtle and natural to dramatic and bold. The material of the lash itself can also vary, with synthetic fibers, mink, and human hair being common options. Each type offers a different look and feel, allowing for personalization to suit any occasion or personal preference.
The ease of application and removal makes them a popular choice for busy individuals.
Types of Magnetic Eyelashes
Magnetic eyelashes come in several forms, each with its own application method and benefits. Understanding these variations helps you choose the best fit for your needs and preferences. The most common types include full magnetic lash strips, magnetic eyeliner lashes, and individual magnetic lash clusters.
Full magnetic lash strips are the most straightforward. They consist of a single lash band with multiple small magnets along its length. These are designed to be placed directly onto your lash line, with one strip often having more magnets than the other to facilitate alignment.
The magnetic force keeps them in place by clinging to each other and, in some cases, to a magnetic eyeliner.
Magnetic eyeliner lashes are a popular variation. Instead of magnets on the lash band itself, these lashes have a magnetic base that adheres to a special magnetic eyeliner. This eyeliner acts as the anchor, and the lashes simply “snap” into place along the applied liner.
This method can feel even more secure for some users and eliminates the need to directly handle magnets on the lash band.
Individual magnetic lash clusters, also known as magnetic lash accents or flares, offer a more customizable approach. These are small bunches of lashes with tiny magnets. They are applied strategically to your natural lashes to add volume or length in specific areas, rather than covering the entire lash line.
This allows for a more natural, buildable look.
When selecting magnetic lashes, consider the number of magnets, the lash band material, and the lash style. More magnets often mean a more secure hold. A flexible lash band provides better comfort and conforms more naturally to your eye shape.
Lash styles range from wispy and natural to dense and dramatic, so pick one that matches your desired look.
How Magnetic Eyelashes Work
The science behind magnetic eyelashes is quite simple and effective. Each lash strip contains tiny, powerful magnets strategically placed along its band. These magnets work in pairs or with a magnetic eyeliner to create a secure bond.
The magnetic force is strong enough to hold the lashes in place throughout the day but gentle enough for easy removal.
For lash strips with multiple magnets, the process usually involves placing one strip above your natural lash line and another strip below. The magnets on both strips are polarized, meaning they attract each other. When you align them correctly, they “snap” together, clamping your natural lashes in between.
This sandwiching effect provides a firm grip without any sticky residue.
In the case of magnetic eyeliner lashes, a special eyeliner formula contains iron oxides, which are magnetic particles. You apply this eyeliner along your lash line as you normally would. The magnetic lashes then have a strip with corresponding magnets that attach to the magnetic eyeliner.
This creates a strong adhesion that holds the lashes firmly in place.
The strength of the magnets is crucial. They are strong enough to withstand everyday activities like blinking, talking, and even light winds, but they are not so strong that they pull on your natural lashes during removal. This balance ensures both security and ease of use.
The placement and number of magnets are designed to distribute the hold evenly across the lash band for maximum comfort and a natural appearance.
It’s important to note that the quality of the magnets and the overall construction of the lash can affect their performance. Higher-quality magnetic lashes often use more sophisticated magnet technology and better materials for a more seamless and comfortable experience. The weight of the lash itself also plays a role in how well the magnets can hold it.
Preparing for Magnetic Eyelash Application
Getting your eyes ready for magnetic lashes is a vital step for a perfect and long-lasting application. Proper preparation ensures that the lashes adhere well and look natural. This involves cleaning your eyelids and ensuring your natural lashes are in good condition.
A clean surface helps the magnets create a secure bond.
Begin by gently cleansing your eyelids. Use a mild, oil-free makeup remover or cleanser to remove any traces of old makeup, especially mascara, eyeliner, and eyeshadow. Any oil or residue on your eyelids can interfere with the magnetic adhesion.
Make sure to dry your eyelids thoroughly with a clean, lint-free cloth. This step is critical for a good grip.
Next, curl your natural lashes. Using an eyelash curler, gently curl your natural lashes. This lifts them and creates a better base for the magnetic lashes to attach to.
Curled natural lashes also help the magnetic ones blend in seamlessly, preventing a noticeable gap between your natural lashes and the falsies. If you have very short or sparse lashes, this step is especially important.
Consider applying a light coat of mascara to your natural lashes. A thin layer of mascara can help your natural lashes grip the magnetic lashes better and blend them together more naturally. However, avoid applying too much mascara, as clumps can hinder the magnetic connection.
Ensure the mascara is fully dry before proceeding to the next step. For magnetic eyeliner lashes, this preparation is slightly different, focusing on a clean, smooth lid for the liner.
For magnetic eyeliner lashes, ensure your eyelid is completely free of oils or lotions. The magnetic eyeliner needs a clean, dry surface to adhere properly. If you have oily eyelids, you might consider using a primer or a small amount of translucent powder to absorb excess oil before applying the magnetic liner.
This ensures the liner stays put and the lashes have a strong anchor.
Cleaning Your Eyelids
A clean eyelid surface is the foundation for successful magnetic eyelash application. Oils, makeup residue, and even dust can prevent the magnets from adhering properly, leading to slippage or premature detachment. Therefore, a thorough yet gentle cleansing is the first crucial step.
Start with a quality makeup remover. Opt for an oil-free formula if possible, especially if you’ll be using magnetic eyeliner. Oils can create a barrier that weakens the magnetic bond.
Gently swipe the remover over your closed eyelids using a cotton pad or pad. Work from the inner corner of your eye outwards.
Pay attention to the lash line itself. This is where the magnetic lashes or eyeliner will make contact. Ensure no traces of old mascara, eyeliner, or eyeshadow remain.
If you’ve worn waterproof makeup, you might need a specific waterproof makeup remover. Be careful not to rub too harshly, as this can irritate the delicate skin around your eyes.
After using the makeup remover, you may want to follow up with a gentle facial cleanser. This helps remove any leftover remover residue and ensures your skin is perfectly clean. Rinse your face thoroughly with lukewarm water.
Avoid hot water, which can strip natural oils and potentially irritate your skin.
Finally, pat your eyelids dry with a soft, lint-free towel or tissue. It’s essential that your eyelids are completely dry before you move on to applying the lashes. Even a small amount of moisture can compromise the magnetic connection.
A clean, dry canvas is key for a secure and long-lasting hold for your magnetic lashes.
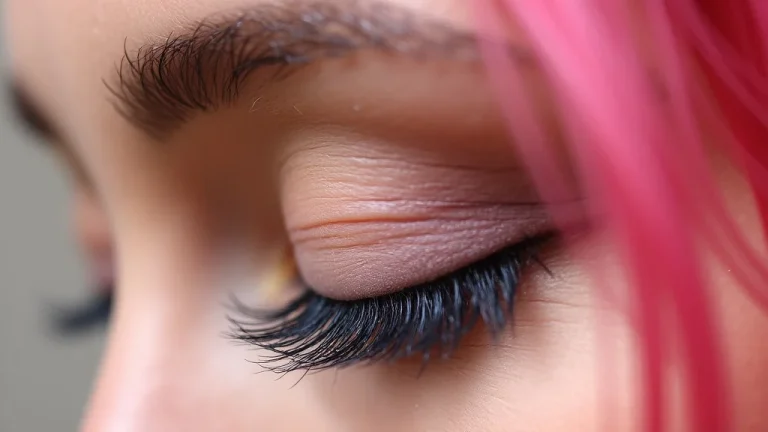
Curling Your Natural Lashes
Curling your natural lashes before applying magnetic ones is a simple yet highly effective step for achieving a more natural and seamless look. This process lifts your natural lashes, providing a better foundation for the magnetic lashes to blend with and reducing the chance of a noticeable gap.
Use a high-quality eyelash curler. Before you begin, ensure the rubber pad on the curler is clean and in good condition. A worn-out pad can pinch or pull your lashes.
Place the curler as close to the base of your natural lashes as possible without touching your eyelid. Gently close the curler and hold for a few seconds.
Work your way up the lash line. You can do this by repositioning the curler slightly higher on your lashes and repeating the squeezing motion. This creates a more even curl from root to tip.
Be gentle; you don’t need to press excessively hard. A few seconds of steady pressure is usually sufficient.
Avoid pumping the curler rapidly. Instead, hold the squeeze for about 5-10 seconds per section. This allows the lashes to hold their shape.
If your lashes are particularly stubborn, you might repeat the process, but always with caution to avoid damaging your lashes.
For those who find manual curlers tricky, consider a heated eyelash curler. These tools use gentle heat to set the curl, often providing longer-lasting results. Whatever method you choose, the goal is to lift and separate your natural lashes, making them appear fuller and creating a perfect platform for your magnetic lashes to integrate with.
How To Use Magnetic Eyelashes Step by Step
Applying magnetic eyelashes is designed to be a straightforward process, even for beginners. The key is precision and understanding the different methods based on the type of magnetic lashes you’re using. We’ll cover the most common techniques here, ensuring you get a beautiful, secure look every time.
First, always start with clean, dry eyelids and curled natural lashes. This preparation ensures optimal adhesion and a natural blend. Have your magnetic lashes and any necessary tools, like tweezers, ready.
Familiarize yourself with your specific lash set; some have more magnets than others, and placement can vary.
If you are using magnetic eyeliner lashes, this will be your first application step. Apply the magnetic eyeliner along your upper lash line, creating the desired wing or line. Allow it to dry completely.
This is crucial for the lashes to adhere. Once dry, the liner will feel slightly tacky.
Now, take your magnetic lashes. If using full strips, you will typically hold one strip with tweezers and align it with your lash line, directly over the dried magnetic eyeliner. The magnets on the lash will snap to the magnetic liner.
You might need to adjust slightly to ensure a comfortable and secure fit.
For lashes that use two magnetic strips to sandwich natural lashes, place one strip slightly above your natural lash line and the other directly below. The magnets will connect, holding your natural lashes in between. Gently press the lash band to ensure it’s secure.
This method requires a bit more precision to align the two pieces.
Take your time with the alignment. The goal is to place the magnetic lashes as close to your natural lash line as possible for the most natural appearance. Once positioned, gently press along the entire lash band to ensure all magnets are securely attached.
Repeat on the other eye.
Applying Magnetic Eyeliner Lashes
Magnetic eyeliner lashes offer a fantastic alternative for those who find traditional magnetic strips challenging to position. The magnetic eyeliner acts as the anchor, simplifying the attachment process. Here’s how to get a flawless application.
Start with clean, dry eyelids. Any oil or residue can prevent the magnetic eyeliner from adhering properly. If you tend to have oily lids, consider using a primer or a bit of translucent powder to absorb excess oil before applying the liner.
Apply the magnetic eyeliner precisely along your upper lash line. Draw your line as you normally would for eyeliner, ensuring it’s the thickness you desire for your lashes to attach to. For most lashes, a slightly thicker line is recommended to accommodate the magnets.
You can create a wing or keep it simple.
Crucially, allow the magnetic eyeliner to dry completely. This usually takes about 60-90 seconds. The liner should feel dry to the touch, not wet or sticky.
It will have a slight tackiness once dry, which is what the lashes adhere to. Rushing this step will result in lashes not sticking.
Once the liner is dry, take your magnetic lashes. Most magnetic lashes designed for eyeliner have a magnetic strip on their lash band. Carefully pick up a lash with tweezers or your fingers.
Align the magnetic strip of the lash band with the dried magnetic eyeliner. The magnets on the lash will adhere to the magnetic liner.
Gently press the lash band down along the eyeliner to ensure a secure connection. Start from the inner corner and work your way outwards. Make sure the entire lash band is firmly attached.
Adjust as needed for comfort and a natural look. Repeat for the other eye.
This method is often considered more foolproof because you’re applying liner, which many people are accustomed to, rather than trying to perfectly position a magnetic strip on its own.
Applying Magnetic Lash Strips (Two-Piece Method)
The two-piece magnetic lash system is designed to mimic your natural lashes by sandwiching them between two magnetic strips. This method provides a secure hold and a very natural look when applied correctly. Follow these steps for a seamless application.
Begin with clean, dry eyelids and curled natural lashes. Ensure your natural lashes are free from mascara or any oily residue. This preparation is essential for the magnets to properly grip both your natural lashes and the magnetic strips.
Take one of the magnetic lash strips, typically the top or outer piece. Using tweezers or your fingers, carefully position it just above your natural lash line. It should sit as close as possible to your natural lashes, without actually touching your eyelid skin.
Next, take the corresponding bottom magnetic lash strip. This strip usually has magnets that will align with the magnets on the first strip. Carefully place this bottom strip just below your natural lash line, allowing it to sandwich your natural lashes between the two strips.
The magnets will attract each other and “snap” into place. Once they connect, gently press along the entire lash band of both strips to ensure a secure bond. You may need to readjust the position slightly to ensure they are aligned and comfortable.
The goal is for the magnetic strips to hug your natural lashes.
It might take a few tries to get the alignment just right. Don’t be discouraged if your first attempt isn’t perfect. Practice makes perfect with any type of false lash.
Ensure the lashes feel secure and comfortable before moving on to the other eye. The aim is for them to feel lightweight and natural.
This method provides excellent hold as your natural lashes help anchor the magnetic strips. It’s particularly good for those who want a fuller look and have enough natural lashes to help secure the magnets.
Applying Individual Magnetic Lash Clusters
Individual magnetic lash clusters offer a customizable way to add volume and length exactly where you want it. This method is perfect for achieving a subtle enhancement or building a dramatic look incrementally. The application requires precision but is very forgiving.
Start with clean, dry eyelids and natural lashes. Curl your natural lashes for a better base. You’ll need your chosen lash clusters, tweezers, and potentially a lash applicator tool designed for magnetic lashes.
Some clusters come with tiny magnetic anchors that attach to your natural lashes.
If your clusters have separate magnetic anchors, apply a tiny amount of magnetic lash bond (often included) to the anchor. Then, using tweezers, carefully place the anchor onto your natural lash, as close to the root as possible.
Take a lash cluster. These clusters have small magnets. Apply a tiny bit of magnetic lash bond to the base of the cluster if recommended by the manufacturer.
Then, using your tweezers or applicator, position the cluster onto your natural lash, right on top of or very near the magnetic anchor you just applied. The magnets will connect.
You can apply clusters to the outer corners for a cat-eye effect, in the middle for added volume, or all along the lash line. Start sparingly and add more as desired. The key is to place them strategically to build your desired look.
Once applied, gently squeeze the cluster and your natural lash between your fingers or the applicator to ensure a secure bond. Make sure the magnets are not irritating your eyelid. You can layer clusters for more density.
This method allows for a truly personalized lash experience.
Tips For Perfect Magnetic Eyelash Wear
Achieving that perfect, long-lasting magnetic lash look involves a few key techniques beyond the initial application. These tips will help ensure your lashes stay put, look natural, and feel comfortable all day long. Small adjustments can make a big difference in your overall experience.
One of the most important aspects is proper alignment. Take your time during application to ensure the magnetic lash band sits as close to your natural lash line as possible. This not only looks more natural but also helps the magnets grip securely.
If there’s a gap, the lash may feel heavy or look unnatural.
Avoid touching your magnetic lashes frequently throughout the day. While they are designed to be secure, excessive touching can weaken the magnetic bond or displace the lashes. If you feel a lash coming loose, try to gently press it back into place without smudging makeup.
Be mindful of water and oil. While many magnetic lashes are fairly water-resistant once applied, prolonged exposure to water or excessive oil can affect their hold. If you’re planning to swim or are in a very humid environment, consider waiting for another day.
Also, avoid applying oily eye creams or makeup removers directly near the lash line.
Consider using magnetic eyeliner in conjunction with magnetic lashes, even if your lashes don’t strictly require it. A thin layer of magnetic eyeliner can act as an extra anchor, providing added security and ensuring the lash band stays in place, especially at the corners.
Finally, if you experience any discomfort, it’s often a sign that the lashes are not positioned correctly or are too heavy for your natural lashes. Gently remove them and try re-applying, ensuring they are balanced and not pulling on your eyelids. A comfortable fit is key to enjoying your magnetic lashes.
Ensuring a Secure Hold
A secure hold is paramount for enjoying magnetic eyelashes without worry. The magnetic technology is designed to be strong, but a few factors can influence its performance. Understanding these can help you achieve a truly reliable application that lasts.
The most critical element is precise alignment. For two-piece lashes, ensure the top strip is directly above and the bottom strip is directly below your natural lashes. The magnets need to be perfectly stacked for maximum attraction.
For magnetic eyeliner lashes, ensure the eyeliner is fully dry and adequately covers the area where the lash magnets will attach.
Don’t underestimate the power of preparation. As mentioned, clean, dry eyelids are essential. Oily lids are the enemy of any adhesive or magnetic system.
If you have oily skin, consider using a primer or a very light dusting of translucent powder on your lids before application. This creates a better surface for adherence.
For two-piece lashes, sometimes a tiny dab of magnetic lash bond applied to the inside of the lash band can add extra security, especially if you have very short or sparse natural lashes. However, use this sparingly, as too much can make removal difficult.
Pay attention to the lash corners. Often, the inner or outer corners are the first to lift. Gently press these areas down after application to ensure full contact with the magnets.
For magnetic eyeliner users, ensure your liner extends fully to the inner and outer corners to provide a complete anchor point.
Finally, if your lashes feel loose after a few hours, it might be time for a reapplication. While magnetic lashes are reusable, the magnetic strength can diminish slightly over time or with frequent contact with oils. A quick refresh might be all that’s needed.
Comfort and Natural Look
Beyond just staying on, magnetic lashes should feel comfortable and look natural. Achieving this balance is what makes them a superior choice for many. It’s about blending technology with aesthetics.
Weight is a significant factor in comfort. Lighter lashes, often made from synthetic fibers or finer materials like mink or faux mink, feel less noticeable and put less strain on your eyelids. If you’re new to magnetic lashes, start with a lighter, more natural style before moving to bolder options.
The flexibility of the lash band also contributes to comfort and appearance. A rigid band can feel stiff and unnatural, digging into your eyelid. Opt for lashes with a flexible band that conforms to the natural curve of your eye.
This allows for better adhesion and a more seamless integration with your natural lashes.
For a natural look, placement is key. The closer the magnetic lash band is to your natural lash line, the more convincing the result. Avoid leaving a visible gap between your natural lashes and the falsies.
Curling your natural lashes and applying a light coat of mascara can help bridge this gap beautifully.
Also, consider the style of the lash. Very dramatic, dense lashes might look artificial in daylight or for everyday wear. Choose a style that complements your eye shape and the overall look you’re going for.
Wispy, layered lashes often provide a more natural volume boost.
If you are using magnetic eyeliner, ensure the liner itself blends well with your natural lash line. A sharp, thick black line might be distracting. You can even apply a thin coat of regular black mascara or liquid liner over the magnetic liner to help disguise it and create a smoother transition.
Removing Magnetic Eyelashes Safely
Removing magnetic eyelashes is generally much simpler and less messy than removing traditional glued lashes, but it still requires a gentle approach. Proper removal prevents damage to your natural lashes and ensures your magnetic lashes can be reused for a long time.
The first step is always to use a suitable makeup remover. An oil-based makeup remover or micellar water is highly effective for dissolving any residual magnetic particles or eyeliner. Apply it to a cotton pad and gently hold it over your closed eyelid for about 20-30 seconds.
This allows the remover to break down the magnetic bond.
Gently swipe the cotton pad along your lash line. You should feel the magnets start to release. If you’re wearing magnetic eyeliner, continue to hold the soaked pad over the liner to help loosen it.
Avoid pulling or tugging forcefully, as this can damage your natural lashes.
Once the lashes begin to detach, carefully slide them away from your lash line. If they resist, apply more remover and wait a bit longer. For magnetic eyeliner, gently wipe away the liner following the direction of your lash line.
After the lashes and eyeliner are removed, cleanse your eyelids thoroughly with your regular facial cleanser to remove all traces of makeup and remover. This is important to prevent any build-up that could affect future applications.
Finally, inspect your magnetic lashes. Gently clean them to remove any residual makeup or magnetic particles. You can use a cotton swab dipped in micellar water or a specialized lash cleaning solution.
Store them properly in their original case to maintain their shape and magnetic strength for future use.
Using Makeup Remover
The right makeup remover is your best friend when it comes to safely detaching magnetic lashes. It works by breaking down the magnetic force and any residual eyeliner, making removal smooth and painless.
Choose an oil-based makeup remover or micellar water. These are highly effective because they can dissolve the magnetic particles in the eyeliner and also help to loosen any grip the magnets might have. Oil-free removers can work, but they might require a bit more effort, especially if you’ve used a strong magnetic eyeliner.
Soak a cotton pad thoroughly with your chosen remover. Don’t be shy with the product; you want the pad to be saturated to ensure it can effectively break down the bond.
Gently press the soaked cotton pad onto your closed eyelid. Hold it there for at least 20-30 seconds. This waiting period is crucial.
It gives the remover time to work its magic, softening the adhesive properties of the magnetic liner and releasing the magnetic connection.
After the waiting period, gently sweep the cotton pad along your lash line. You should feel the magnets start to separate. If the lashes don’t detach easily, hold the pad there a bit longer or apply a fresh, saturated pad.
Resist the urge to pull. Pulling can cause your natural lashes to break or be uprooted.
Once the lashes are removed, use a fresh cotton pad to gently wipe away any remaining eyeliner or magnetic residue from your lash line and lid. This ensures your skin is clean and prepared for your nightly skincare routine.
Cleaning and Storing Magnetic Lashes
Proper cleaning and storage are essential for maintaining the longevity and performance of your magnetic eyelashes. Well-cared-for lashes will last longer, retain their magnetic strength, and look better with each use.
After removing your lashes, the next step is cleaning. You’ll want to remove any makeup residue, mascara, or product build-up. Use a cotton swab dipped in micellar water or a gentle oil-free eye makeup remover.
Carefully run the swab along the lash band and the lashes themselves, picking off any debris.
Be gentle during this process. Avoid soaking the lashes entirely, as this can damage the magnets or the lash fibers. If the lashes have a lot of mascara on them, you can try a very gentle lash shampoo or a diluted baby shampoo solution.
Rinse with cool water and pat dry very gently with a tissue.
For magnetic eyeliner lashes, ensure the magnetic strip on the lash band is completely clean. Any dried magnetic eyeliner residue can interfere with future applications. A thorough wipe with a damp cotton swab is usually sufficient.
Once clean and completely dry, it’s time to store them. The best way to store magnetic lashes is in their original case. These cases are designed to protect the lashes and keep the magnets from sticking to unintended surfaces.
Most cases have specific slots or trays that help maintain the lash’s shape.
Ensure the magnets are not pressed against each other in a way that could cause them to lose their polarity or weaken over time. Keeping them organized in their case also makes them easy to find and select for your next application. Proper care will extend their lifespan significantly.
Common Myths Debunked
Myth 1: Magnetic eyelashes are difficult to apply
This is a common misconception. While any new beauty product can have a slight learning curve, magnetic eyelashes are designed for ease of use. Methods like magnetic eyeliner lashes are particularly beginner-friendly, as they simply attach to a pre-applied liner.
The two-piece sandwich method requires a bit more precision but is still far less messy than dealing with lash glue. With a little practice, most people find them quite simple to apply.
Myth 2: Magnetic lashes damage natural lashes
When applied and removed correctly, magnetic eyelashes should not damage your natural lashes. The magnets are designed to hold the lash strip securely without pulling or tugging. The key is to avoid forceful removal and to always use a proper makeup remover.
If you experience damage, it’s likely due to improper removal techniques rather than the lashes themselves. Always be gentle.
Myth 3: Magnetic lashes only look unnatural
The natural look of magnetic lashes depends heavily on the style you choose and how well they are applied. There are countless styles available, from subtle, everyday enhancements to dramatic, voluminous looks. When applied close to the natural lash line and blended with your own lashes, they can achieve a very seamless and natural appearance.
The key is selecting a style that complements your eye shape and the overall desired effect.
Myth 4: Magnetic lashes are uncomfortable to wear
Comfort is subjective, but generally, magnetic lashes are considered very comfortable, especially compared to traditional falsies. They don’t involve sticky glue that can irritate the eyes or feel heavy. The weight is distributed along the lash band by the magnets.
If you find them uncomfortable, it might be due to the lash style being too heavy or the band not conforming well to your eye shape. Choosing lighter, more flexible options can greatly improve comfort.
Frequently Asked Questions
Question: How long do magnetic eyelashes last?
Answer: With proper care and cleaning, magnetic eyelashes can be reused many times, often between 30 to 60 applications or even more. The longevity depends on the quality of the lashes and how well they are maintained after each use, ensuring magnets remain strong and fibers are clean.
Question: Can I wear mascara with magnetic eyelashes?
Answer: It’s generally best to apply mascara to your natural lashes before applying magnetic lashes to help them blend better. Applying mascara directly to magnetic lashes can make them clumpy, difficult to clean, and may weaken the magnets over time.
Question: What if the magnets don’t stick?
Answer: Ensure your eyelids are clean and completely dry. Oil or moisture can prevent the magnets from adhering. If using magnetic eyeliner, make sure it’s fully dry before applying the lashes.
For two-piece lashes, ensure the strips are perfectly aligned so the magnets connect properly.
Question: Can I swim or shower with magnetic eyelashes on?
Answer: While many magnetic lashes are somewhat water-resistant once applied, prolonged exposure to water or heavy steam can weaken the magnetic hold. It’s not recommended to swim or shower with them on if you want them to stay securely in place all day.
Question: Are magnetic eyelashes suitable for sensitive eyes?
Answer: Yes, magnetic eyelashes are often a great option for people with sensitive eyes or those who have experienced allergic reactions to lash glue. Since they are glue-free, they are generally considered hypoallergenic and less irritating.
Conclusion
Mastering how to use magnetic eyelashes is a straightforward skill that greatly simplifies achieving beautiful lashes. By following simple preparation, precise application, and gentle removal, you can enjoy fuller, longer lashes without the mess or hassle of glue, making your beauty routine faster and more enjoyable.