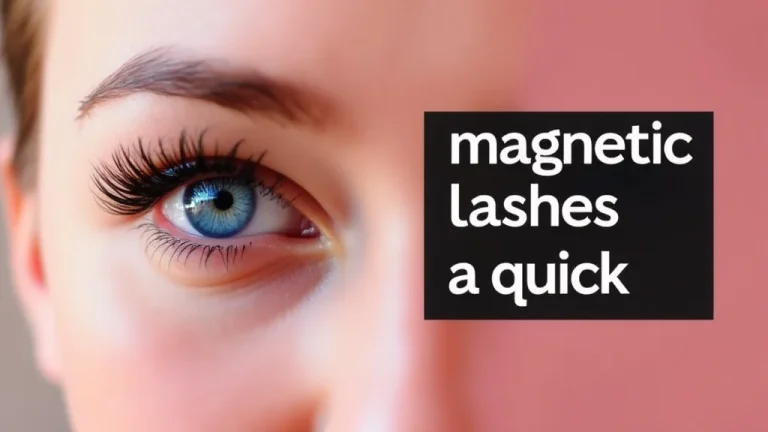
Have you ever spent precious minutes trying to get your eyeliner just right, only for it to smudge or end up uneven? You want gorgeous lashes for a night out or a special occasion, but the thought of fiddly liner feels like too much work. What if you could achieve stunning, full lashes quickly and easily, skipping the liner step altogether?
This guide will show you how to achieve beautiful lashes using magnetic options without needing any eyeliner. You’ll discover simple techniques to make your magnetic lash application a breeze, saving you time and frustration.
Key Takeaways
- Understand why magnetic lashes without liner are a popular choice.
- Learn the different types of magnetic lashes available that don’t require liner.
- Master the application techniques for seamless, liner-free magnetic lashes.
- Discover tips for choosing the right magnetic lashes for your eye shape and desired look.
- Find out how to care for your magnetic lashes to ensure they last.
- Troubleshoot common issues encountered when using magnetic lashes without liner.
The Rise of Magnetic Eyelashes Without Liner
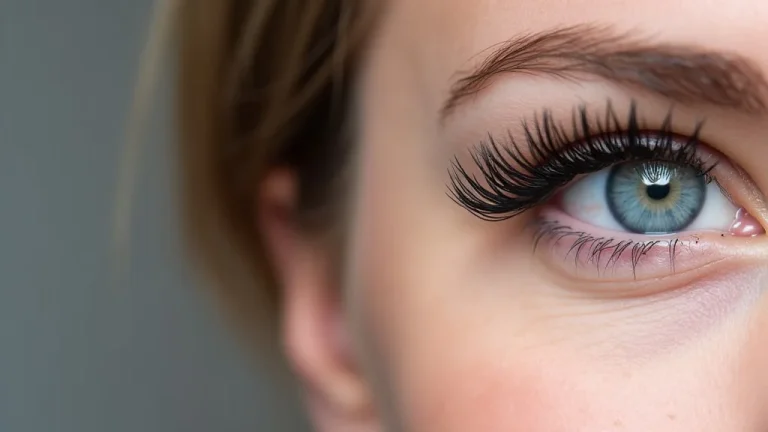
Magnetic eyelashes have revolutionized the way people apply false lashes, offering a faster and often more user-friendly alternative to traditional adhesive strips. While many magnetic lash systems involve magnetic eyeliner as a key component, a significant and growing segment of the market focuses on magnetic lashes that can be applied without any liner at all. This trend is driven by a desire for simplicity, speed, and a solution for those who find eyeliner difficult to apply or simply prefer to avoid it. The core innovation behind these liner-free options is the placement of magnets directly on the lash band itself, allowing them to adhere to a natural lash line or a specialized magnetic base that doesn’t resemble traditional liquid or pencil eyeliner. This allows for a clean, natural look that can be achieved in a matter of moments.
These liner-free magnetic lashes are ideal for individuals with sensitive eyes, those with oily eyelids that cause traditional adhesives to slip, or anyone who wants a quick beauty fix. The absence of eyeliner means fewer products to manage and less potential for smudging or mistakes. This section explores the advantages of choosing magnetic lashes that eliminate the need for liner, from their ease of use to their versatility in creating various lash looks without the commitment or difficulty of mastering eyeliner application. We will look at how they work and why they have become so popular among beauty enthusiasts seeking convenience and efficacy in their beauty routines.
How Liner-Free Magnetic Lashes Work
The magic behind liner-free magnetic eyelashes lies in their ingenious design. Instead of relying on magnetic eyeliner to create a sticky surface for the lash band to attach to, these lashes feature multiple small magnets strategically placed along the entire length of the lash band. These magnets are designed to “sandwich” your natural eyelashes. Typically, you apply a set of magnetic lashes below your natural lash line, and then another set above. The magnets on each lash strip then click together, securely holding the false lashes in place against your natural lashes. Some variations might use a magnetic strip that adheres to the eyelid without looking like eyeliner, acting as a base for the magnetic lashes.
The strength and placement of these magnets are crucial for a secure and comfortable fit. Manufacturers carefully engineer the size and number of magnets to ensure they are strong enough to hold the lashes throughout the day but subtle enough not to feel heavy or noticeable. The material of the lash band is also important; it needs to be flexible enough to contour to the shape of your eyelid for a natural appearance. Understanding this mechanism is key to a successful application and ensures you can appreciate the convenience of a liner-free look. This method bypasses the need for sticky formulas or precise drawing skills associated with eyeliner, making it accessible to a wider range of users.
- Sandwich Method: The most common approach involves two sets of magnetic lashes. One set is placed on the top of your natural lashes, and the other is placed underneath. The magnets on both strips then attract each other, gently gripping your natural lashes.
- Micro-Magnet Bands: Some lashes use very tiny magnets embedded directly into the lash band, making them almost invisible. These can be applied with tweezers for precise placement, adhering to the natural lash line without any visible liner.
- Magnetic Strips: A less common but emerging type involves a flexible magnetic strip that adheres to the eyelid very close to the lash line. This strip acts as a magnetic anchor, and the magnetic lashes then attach to it. This provides a liner-like effect without actually being eyeliner.
Types of Liner-Free Magnetic Lashes
The world of magnetic lashes without liner offers a surprising variety, catering to different preferences and desired looks. Understanding these distinctions will help you choose the perfect pair. The primary differences lie in the number of magnets used and how they are integrated into the lash band. Some are designed for a subtle, natural enhancement, while others aim for dramatic volume and length. The materials used also vary, affecting the look and feel of the lashes, from natural-looking mink-like fibers to synthetic options.
The key to selecting the right type is to consider your eye shape, the occasion, and the overall style you wish to achieve. For a more natural look, lashes with fewer, smaller magnets might be preferable as they tend to be lighter and more flexible. For a bolder statement, lashes with more magnets and denser lash designs can provide that extra drama. The flexibility of the lash band is also a critical factor; a more pliable band will conform better to your eyelid’s natural curve, leading to a more comfortable and seamless application, even without the support of eyeliner.
- Full Strip Lashes with Multiple Magnets: These are the most common type. The entire lash band is dotted with tiny magnets, usually 5-6 per lash. These are designed to be applied directly onto your natural lash line, with magnets on the top strip adhering to magnets on the bottom strip. They offer a full coverage effect and are great for everyday wear or a more dramatic look, depending on the lash style.
- Segmented or Cluster Magnetic Lashes: Instead of one long strip, these lashes come in smaller sections or clusters of lashes. Each section has one or two magnets. This allows for more customizable application, enabling you to focus on specific areas of your lash line or create a unique lash shape. They are often easier to place precisely, especially for beginners.
- One-Piece Magnetic Lashes (Inner/Outer Corner Focus): Some designs are specifically for the inner or outer corners of the eye, featuring a few magnets. These are perfect for adding a subtle lift or accent to your natural lashes without needing to cover the entire lash line. They are a great option for a very natural enhancement or to complement other lash types.
- Magnetic Anchors or Bases: While not strictly ‘no liner,’ these systems use a thin, flexible magnetic strip that adheres to the lid close to the lash line. The magnetic lashes then attach to this strip. The strip itself is very subtle and often looks like a very thin, dark line, but it is not applied like traditional liquid or pencil eyeliner. It’s a good alternative for those who struggle with liquid liner but want a defined lash base.
Applying Magnetic Eyelashes Without Liner
Achieving a flawless look with magnetic eyelashes without liner might seem tricky at first, but with the right technique, it becomes surprisingly simple. The key is precision and patience. Unlike magnetic liner lashes which offer a sticky base, these require the magnets to do all the work. This means aligning them perfectly so they can securely adhere to each other and your natural lashes. The goal is to get the magnetic lash band as close to your natural lash line as possible for a seamless blend.
One of the most effective methods involves using a pair of fine-tipped tweezers to place the lashes. Tweezers provide better control and allow you to get closer to your lash line. Starting with the top lash strip and positioning it carefully along your natural lashes is usually the best approach. Then, take the bottom lash strip and gently place it below your natural lashes, allowing the magnets to find each other. Small adjustments can be made with the tweezers until the lashes feel secure and look natural. Practicing this motion a few times can greatly improve your speed and confidence.
Step-by-Step Application Guide
Getting the hang of magnetic lashes without liner is all about following a few simple steps. Each step is designed to ensure your lashes look amazing and stay put all day. Remember that practice makes perfect, so don’t get discouraged if your first attempt isn’t flawless.
- Prepare Your Natural Lashes: Gently curl your natural lashes if desired. You can also apply a light coat of mascara to your natural lashes. This helps them blend better with the magnetic lashes and provides a bit of grip for the magnets. Ensure your lashes are clean and dry before you begin.
- Position the Top Magnetic Lash: Take one of the magnetic lash strips (usually the top one). Using fine-tipped tweezers or your fingers, hold the lash strip just above your natural lash line. The goal is to have the lash band sit as close as possible to your natural lashes, without touching your eyelid directly.
- Secure the Top Lash: Carefully apply the top magnetic lash strip. The magnets should rest on top of your natural lashes. You might need to adjust its position slightly to ensure it follows the curve of your eye.
- Apply the Bottom Magnetic Lash: Now, take the corresponding bottom magnetic lash strip. Position it just below your natural lashes, so its magnets are directly underneath the magnets of the top strip.
- Click and Secure: Gently bring the bottom lash strip towards the top lash strip. You should feel a “click” as the magnets attract and connect, sandwiching your natural lashes.
- Adjust for Comfort and Look: Once the magnets are connected, gently press along the lash band with your fingertip to ensure a secure fit. You can carefully reposition the lashes if needed. Check the appearance in a mirror to ensure they look even and natural.
- Repeat for the Other Eye: Follow the same steps for your other eye to complete your lash look.
Tips for a Seamless, Natural Look
Achieving a natural look with magnetic lashes without liner is entirely possible with a few key tricks. The goal is to make the lashes appear as if they are growing directly from your own lash line, without any visible gap or awkward positioning. This involves careful placement and choosing the right lash style for your eye shape.
The most crucial factor is the placement of the magnetic lash band. It needs to sit directly on top of your natural lashes, as close to the root as possible. If the band is too high on your lid, it will look unnatural and might feel heavy. If it’s too far from your natural lashes, you’ll see a gap.
Another tip is to consider the weight and style of the lashes. For a natural look, opt for lighter, more natural-looking lash styles rather than overly dramatic or dense ones. Lashes with thinner bands and less volume tend to blend better.
Sometimes, a light application of mascara on your natural lashes before applying the magnetic lashes can help them meld together. This can provide a bit more grip and camouflage the junction between your natural and false lashes. However, be careful not to apply too much mascara, as it can make your natural lashes clumpy and hinder the magnets from adhering properly.
Trimming the lash strip can also make a significant difference, especially if the full strip is too long for your eye shape. You can trim a bit from the outer edge to better fit your eye’s curve. Always trim from the outer corner to maintain the lash’s design.
- Placement is Key: Always aim to place the magnetic lash band directly on top of your natural lashes, as close to the lash line as possible. This creates the illusion of naturally fuller lashes.
- Curl Your Natural Lashes: Before applying magnetic lashes, curling your natural lashes can provide a better anchor and help them blend seamlessly. It gives the magnetic lashes something to rest on and blend into.
- Use the Right Tweezers: Fine-tipped, angled tweezers are your best friend. They allow for precise placement of both the top and bottom lash strips, ensuring they connect perfectly.
- Trim If Necessary: If the magnetic lash strip is too long for your eye shape, don’t hesitate to trim it. Always trim from the outer corner to maintain the lash’s intended style.
- Mascara as a Blend Aid: A very light coat of mascara on your natural lashes can help them blend with the magnetic ones. It adds a bit of color and texture, making the transition less noticeable.
Choosing the Right Magnetic Lashes Without Liner
Selecting the perfect pair of magnetic lashes without liner is essential for achieving your desired look and ensuring a comfortable, secure fit. With so many options available, it’s helpful to understand what factors to consider. The beauty of liner-free magnetic lashes is their versatility, but not all styles are suited for every eye shape or preference. Thinking about your natural eye shape, the occasion, and the overall aesthetic you’re aiming for will guide you to the best choice.
The material of the lashes plays a significant role in their appearance and feel. Natural hair fibers, synthetic fibers, and faux mink are common. Each offers a different level of drama and realism. For a subtle enhancement, lighter, natural-looking fibers are best. For a more dramatic effect, denser, thicker fibers can be chosen. The length and curl of the lashes also contribute to the final look, ranging from short and natural to long and voluminous.
Matching Lashes to Your Eye Shape
Understanding your eye shape is the first step in selecting magnetic lashes that will enhance your natural beauty without the need for liner. Different lash styles can either flatter or overwhelm specific eye shapes. The goal is to create balance and draw attention to your eyes in the most effective way possible.
For almond-shaped eyes, which are considered versatile, most lash styles work well. You can experiment with different lengths and volumes. Lashes that are slightly longer at the outer corners can further accentuate the beautiful almond shape.
Round eyes can benefit from lashes that add length, especially towards the outer corners. This helps to elongate the eye and give it a more almond-like appearance. Avoid lashes that are uniformly dense all around, as this can make round eyes appear even rounder.
Hooded eyes, where the eyelid skin hangs over the crease, often look best with lashes that are shorter in the inner corner and gradually get longer towards the outer corner. This helps to lift the eye and prevent the lashes from getting lost in the hood.
Monolids have a relatively flat surface without a visible crease. For monolids, lashes with a dramatic curl and length can add definition and make the eyes appear larger and more open. Wispy, fluttery styles also work well.
Downturned eyes benefit from lashes that provide lift. Applying more volume and length to the outer corners can help to create an upward, more lifted effect, counteracting the natural downward curve of the eye.
- Almond Eyes: These eyes are a beauty enthusiast’s dream as most lash styles suit them. Elongated lashes, especially those with more volume towards the outer corners, will beautifully enhance their shape.
- Round Eyes: To add an elegant oval shape, focus on lashes that are longer at the outer corners. This technique draws the eye outwards, creating a more sophisticated and elongated appearance.
- Hooded Eyes: For hooded eyes, opt for lashes that are shorter towards the inner corner and gradually increase in length towards the outer edge. This helps to lift the eye and prevent the lashes from being hidden.
- Monolids: Lashes with significant curl and volume can make monolids appear more open and defined. Wispy, feathery lashes also work wonderfully to add dimension.
- Downturned Eyes: To create an uplifting effect, choose lashes that are more voluminous and longer at the outer corners. This helps to balance the natural curve of the eye.
Considering Lash Material and Band Flexibility
The material of your magnetic lashes and the flexibility of their band are critical for comfort and a natural appearance, especially when you’re not using eyeliner. These two factors directly impact how the lashes look, feel, and integrate with your natural lash line.
Lash materials vary from synthetic fibers to natural human hair or animal hair like mink. Synthetic lashes are often more affordable, durable, and can hold a curl well. They can range from very natural to quite dramatic. Natural hair fibers, such as mink or silk, tend to be lighter, softer, and more flexible, offering a more realistic and luxurious look. They often mimic the texture and feel of real lashes more closely. For a truly seamless, liner-free look, softer, more flexible materials tend to be easier to blend.
The flexibility of the lash band is equally important. A stiff band can be difficult to curve to the shape of your eyelid, leading to gaps between the band and your natural lashes, or an uncomfortable fit. A flexible band will contour smoothly to your eye, creating a snug fit that mimics the natural curve of your lash line. This is especially vital for liner-free magnetic lashes, as the band needs to adhere closely without the extra support or camouflage that eyeliner might provide. A flexible band also ensures the magnets align better with your natural lashes, leading to a more secure and natural-looking application.
Think of it like fitting a glove to your hand. A flexible glove will hug your fingers and palm perfectly, while a stiff one will have awkward bulges and gaps. The same applies to lash bands and your eyelids.
A flexible band ensures the lashes sit flush, making them look more natural and feel more comfortable throughout the day.
- Synthetic Fibers: These are versatile and can mimic various lash looks. They are durable and often more budget-friendly. For a liner-free look, opt for synthetic lashes with a softer feel and a well-defined taper.
- Natural Hair (Mink, Silk): These materials are known for their softness, lightness, and natural sheen. They are excellent for achieving a very realistic appearance and blending seamlessly without liner.
- Band Stiffness: A stiff band can cause discomfort and visible gaps. Look for lashes with a thin, flexible band that easily bends and conforms to the curve of your eyelid for a snug fit.
- Band Color: While not always a primary consideration, a clear or very thin black band can be easier to disguise. However, with proper placement, the band’s color becomes less noticeable.
Caring for Your Liner-Free Magnetic Lashes
To get the most out of your investment in magnetic lashes without liner, proper care is essential. These lashes can be reused multiple times if you treat them gently. Unlike disposable falsies, magnetic lashes, when cared for correctly, can last for many applications, making them an eco-friendly and cost-effective choice. The key is to remove them carefully and store them properly.
The primary enemies of magnetic lashes are makeup residue, glue, and rough handling. When you remove them, it’s important to do so with care, ensuring you don’t pull or tug at the magnets or the lash fibers. Cleaning them gently after each use will prevent buildup that can affect their adhesion and appearance.
Cleaning and Storage Techniques
Keeping your magnetic lashes clean and organized ensures they maintain their shape and magnetic strength. It’s a simple process that adds longevity to your favorite lash styles. Always handle the magnets with care, as they can lose their strength if dropped or forced together.
The best way to clean magnetic lashes is by using a gentle makeup remover or micellar water on a cotton swab. You want to remove any makeup residue or oils that may have accumulated on the lash band and magnets. Avoid submerging the lashes in liquid or using harsh chemicals, as this can damage the fibers and affect the magnets.
After cleaning, allow the lashes to air dry completely. Never use heat, as this can warp the lash fibers. Once dry, store them in their original case.
The case usually has a molded interior that keeps the lashes separated and prevents them from getting crushed or tangled. This also keeps the magnets from sticking to each other or other metal surfaces.
- Gentle Removal: Always remove magnetic lashes by gently separating the magnets. Never pull on the lash fibers themselves, as this can damage them.
- Cleaning Makeup Residue: Use a cotton swab dipped in a gentle oil-free makeup remover or micellar water to carefully wipe away any makeup or oil from the lash band and magnets.
- Air Dry Thoroughly: After cleaning, let the lashes air dry completely on a clean surface or a dedicated lash tray. Do not use heat, as it can alter the lash shape.
- Store in Original Case: Keep your magnetic lashes in their original case. The case protects them from damage, keeps the magnets from sticking to each other or other surfaces, and helps them retain their shape.
- Avoid Water Exposure: Do not wash magnetic lashes under running water or soak them. This can damage the adhesive holding the magnets and affect the integrity of the lash band.
Extending Lash Lifespan
To maximize the number of times you can wear your magnetic lashes without liner, focus on consistent, gentle care. The magnets are designed to be durable, but the delicate lash fibers and the integrity of the band are what will eventually show wear and tear. Treating them as you would any high-quality beauty tool will ensure they look great for many occasions.
The most common reason for reduced lifespan is improper handling during application and removal. Pulling the lashes apart forcefully can bend the lash band or even dislodge the magnets. Similarly, allowing them to become saturated with oily makeup or improperly stored can lead to clumping and a loss of shape.
Another factor is applying them over very wet or oily eyelids. While magnetic lashes are great for oily lids compared to adhesive, excess oil can still interfere with the magnetic bond. Ensuring your eyelids are clean and dry before application is a simple step that greatly contributes to the lashes staying put and lasting longer.
- Handle with Care: Always treat your magnetic lashes gently during application and removal. Avoid tugging on the lash fibers; instead, focus on separating the magnets.
- Keep Magnets Clean: Regularly cleaning any makeup residue off the magnets ensures they maintain their full magnetic strength for optimal adhesion.
- Apply to Clean Lids: Ensure your eyelids are clean and dry before applying magnetic lashes. This allows the magnets to grip effectively without interference.
- Avoid Over-Styling: Refrain from excessive curling or applying heavy mascara to magnetic lashes, as this can damage the fibers and affect their natural appearance and flexibility.
Common Myths Debunked
Magnetic lashes without liner have gained immense popularity, but like many beauty trends, they are surrounded by misconceptions. Addressing these myths can help potential users make informed decisions and enjoy the benefits of this innovative beauty product. Dispelling these common myths ensures you have a clear picture of what to expect and how to best use your magnetic lashes.
Myth 1: Magnetic Lashes Are Difficult to Apply
One of the most common myths is that magnetic lashes are hard to put on, especially without eyeliner. However, many users find them easier than traditional strip lashes with glue. The “sandwich” method, where you apply one strip above your natural lashes and another below, allows the magnets to do the work of securing them.
With a little practice using tweezers for precision, application can become quick and simple.
Myth 2: Magnetic Lashes Are Uncomfortable or Heavy
Another misconception is that the magnets make magnetic lashes heavy and uncomfortable to wear. Modern magnetic lashes are designed with tiny, lightweight magnets strategically placed along a flexible band. When applied correctly, they feel secure but not heavy, and the flexible band contours to the eye, preventing irritation.
Many users report they forget they are even wearing them.
Myth 3: Magnetic Lashes Only Look Natural with Eyeliner
This is simply not true. Many magnetic lash styles are designed specifically to look natural and seamless without any eyeliner. The key is choosing the right lash style for your eye shape and placing the lash band as close as possible to your natural lash line.
The absence of eyeliner can even contribute to a softer, more natural appearance for some.
Myth 4: Magnetic Lashes Damage Your Natural Lashes
When applied and removed correctly, magnetic lashes are not harmful to your natural lashes. The magnets grip the lashes gently, and as long as you avoid pulling or tugging during removal, your natural lashes should remain unharmed. The key is to be patient and careful during the removal process.
Frequently Asked Questions
Question: Can I wear magnetic lashes without any eyeliner at all?
Answer: Yes, absolutely! Many magnetic lash systems are designed to be applied directly to your natural lash line without the need for any eyeliner. The magnets on the lash bands adhere to each other, securing the lashes in place.
Question: How do I prevent magnetic lashes from falling off?
Answer: Ensure your eyelids are clean and dry before application. Position the lash bands as close as possible to your natural lash line and make sure the magnets connect securely. Gentle adjustment with tweezers can help achieve a firm hold.
Question: How many times can I reuse magnetic lashes without liner?
Answer: With proper care, cleaning, and storage, magnetic lashes can be reused many times, often for dozens of applications. Gently removing makeup residue and storing them in their original case are key to their longevity.
Question: What if I can’t feel the magnets connecting?
Answer: Try repositioning the lashes slightly. Ensure you are aligning the magnets directly above and below your natural lashes. Using angled tweezers can help you get a more precise connection.
Question: Are magnetic lashes waterproof?
Answer: Most magnetic lashes are not fully waterproof. While they are generally resistant to smudging from sweat or light moisture, they can come loose if submerged in water or exposed to heavy rain.
Conclusion
Magnetic eyelashes without liner offer a brilliant, fuss-free way to enhance your eyes. They provide beautiful results without the tricky application of eyeliner. With the right techniques and lash choice, you can achieve a natural, stunning look that saves you time. Enjoy gorgeous lashes effortlessly.